Zapier Custom API Calls Using Webhooks Tool
Zapier is a powerful and effective service and tool that makes it very easy to send and receive custom API calls, modify and format them, and/or trigger a variety of other actions across virtually any platform with a functioning API. It takes the cost, risks, and other busy work out of catching hooks and sending calls by offering a server and build environment develop and operate out of. It’s awesome, and at Digital 1, it’s made our process for creating flexible custom integrations for our customers faster, more efficient, more effective, and perhaps most of all easier to manage.
Starting with a Zapier Trigger
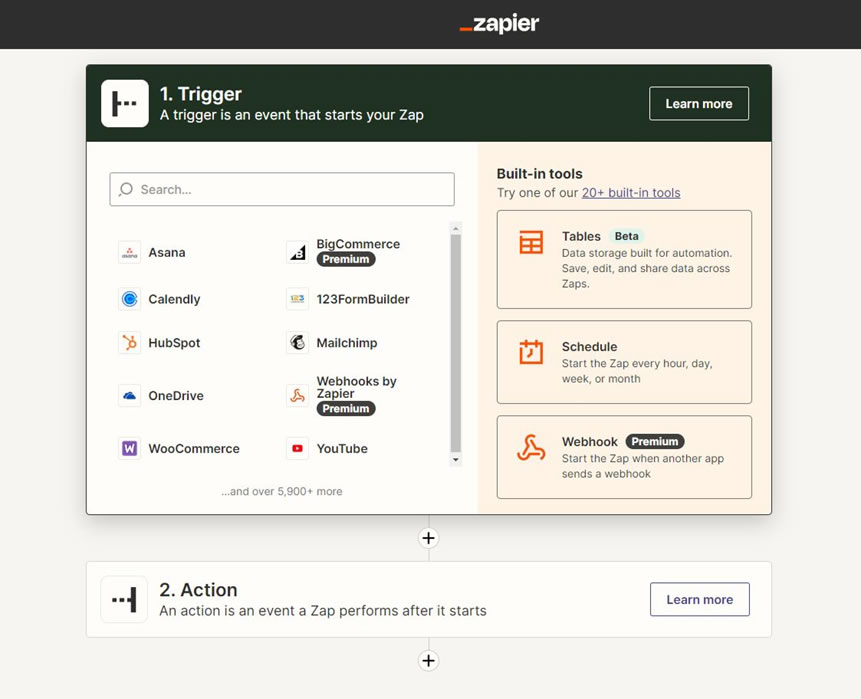
- For any Zap, you need to start with a trigger. This can literally be anything you want, but it’s the starting point for all Zaps. A trigger is something that starts the Zap going – usually something like a form submission, perhaps a webhook received from another application, etc. In this example, we’re going to use a HubSpot form submission as our trigger for the Zap, then run our custom API call as the second step in the Zap.
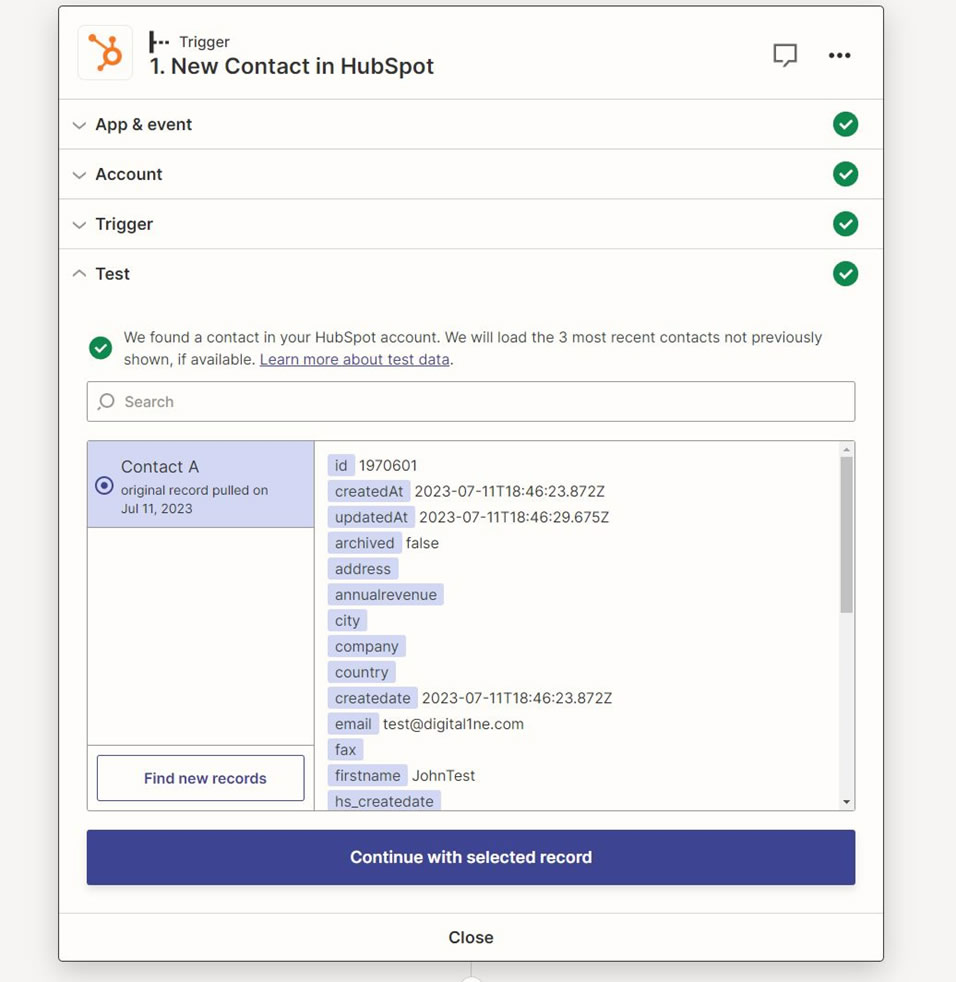
- In App & Event, we selected HubSpot, chose our account, selected the trigger as “New Contact” – which triggers this Zap when a new contact is created in HubSpot – then tested the trigger looking for recent submissions. You should be able to see the raw data found in the trigger data.
NOTE: You will need a fairly recent data point for this to work, so if you’re not getting any data, try running your trigger action again in the platform or origin (in this case HubSpot), then have Zapier look again.
Custom API Requests
- Once you’ve validated your trigger data, it’s time to get cooking on creating the custom API call. Zapier makes it pretty easy to fill in the appropriate data, but if you’ve never done it before, it can feel a little foreign – especially for experienced coders used to certain syntax
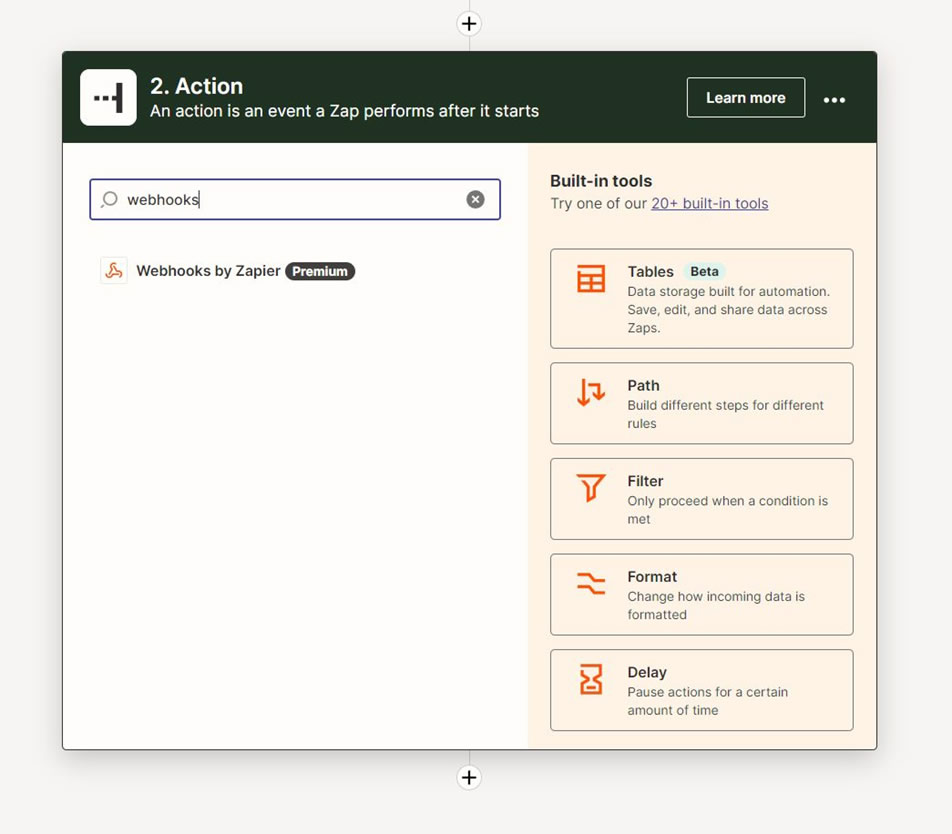
- In the next Action section of your Zap, type webhooks in the search bar to bring up the tool
- Pull up the dropdown menu for “Event” option. This is where you can set your call type. In this example, we’re going to select “Custom Request”. This option gives you the most flexibility, especially if you’re running calls you’ve already written in whatever language your platform requires.
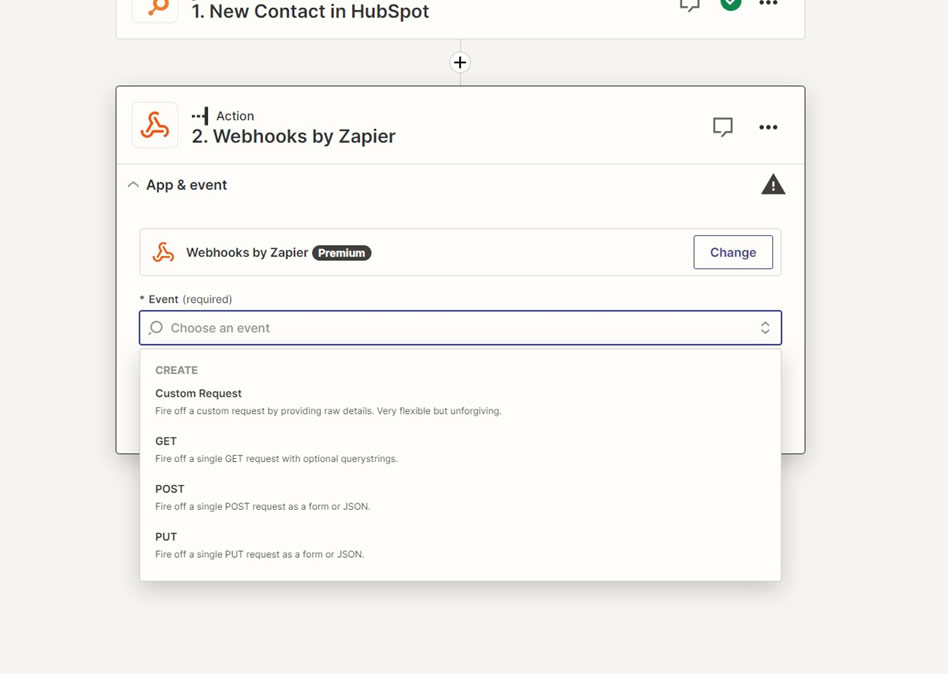
- After selecting Custom Request, you’ll all of the options Zapier gives you to customize your API call.
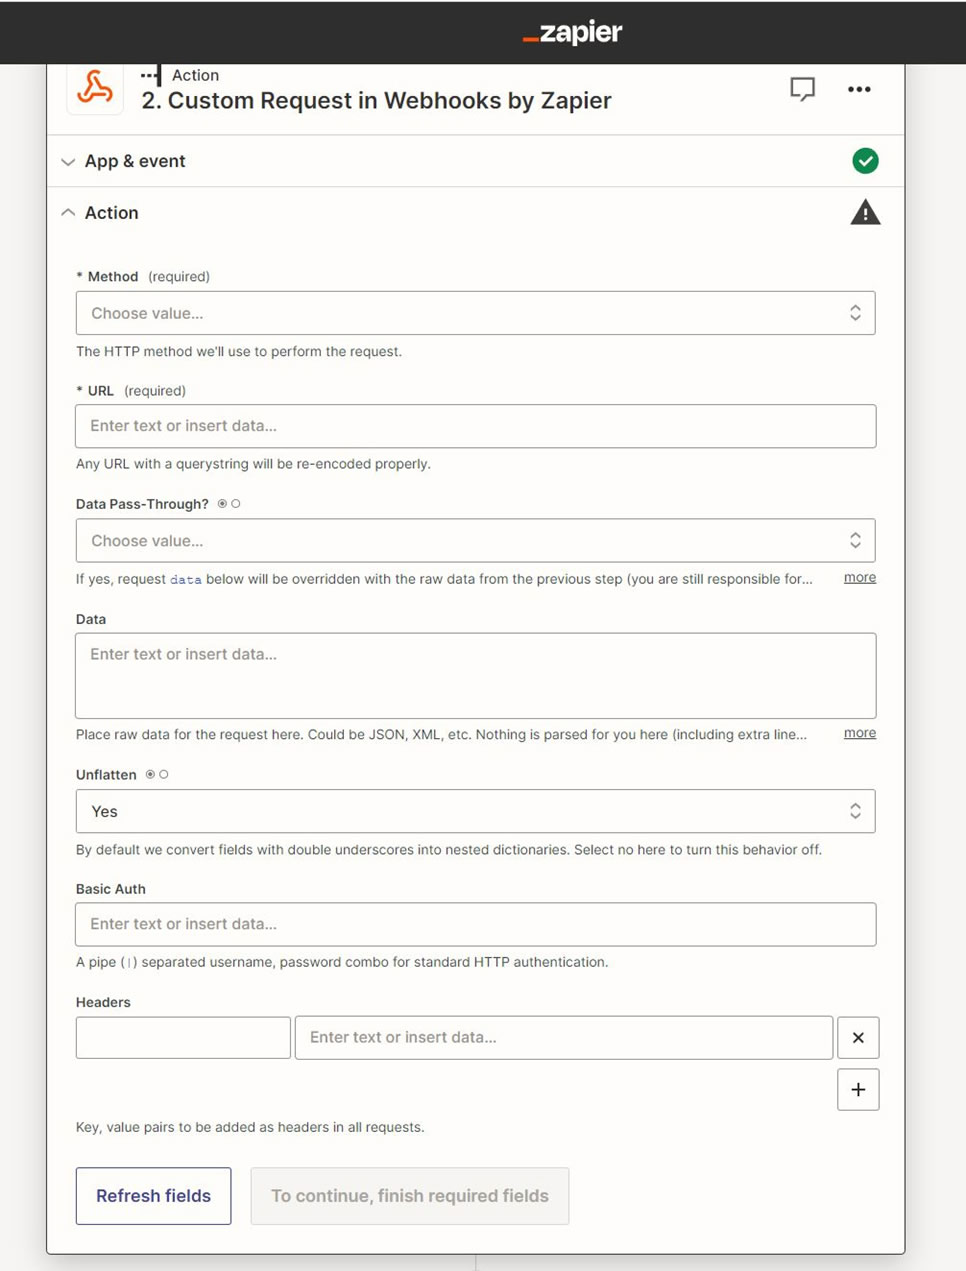
Putting Together Your API Request
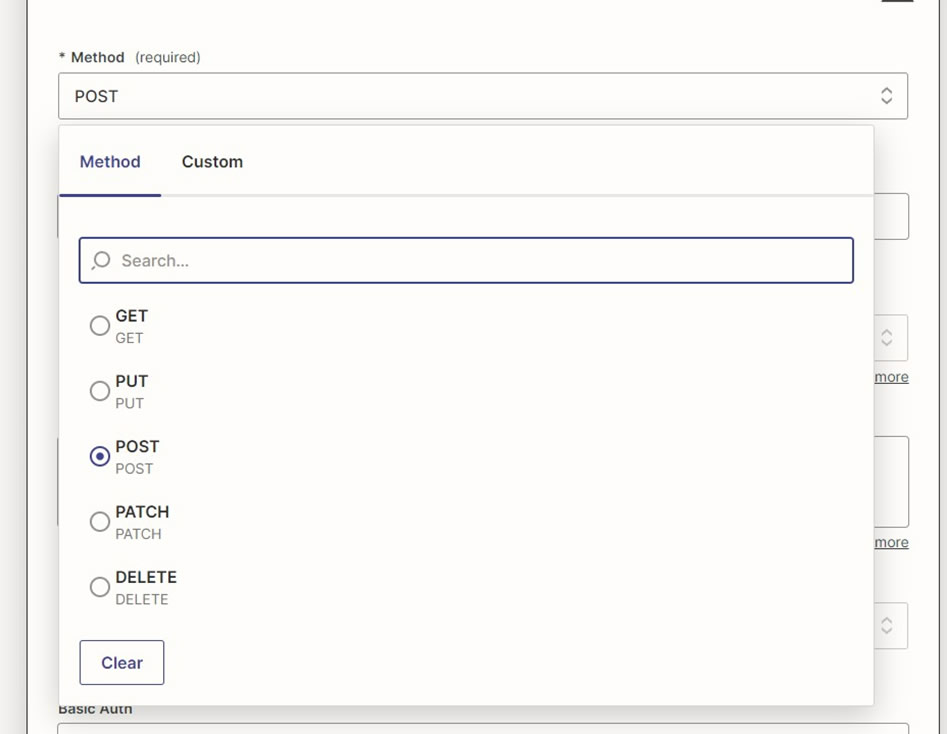
- Now it’s time to put together you API request. In this example, we’ll do a POST call just to demonstrate putting together a JSON body. However, you can do any type of API call you wish.
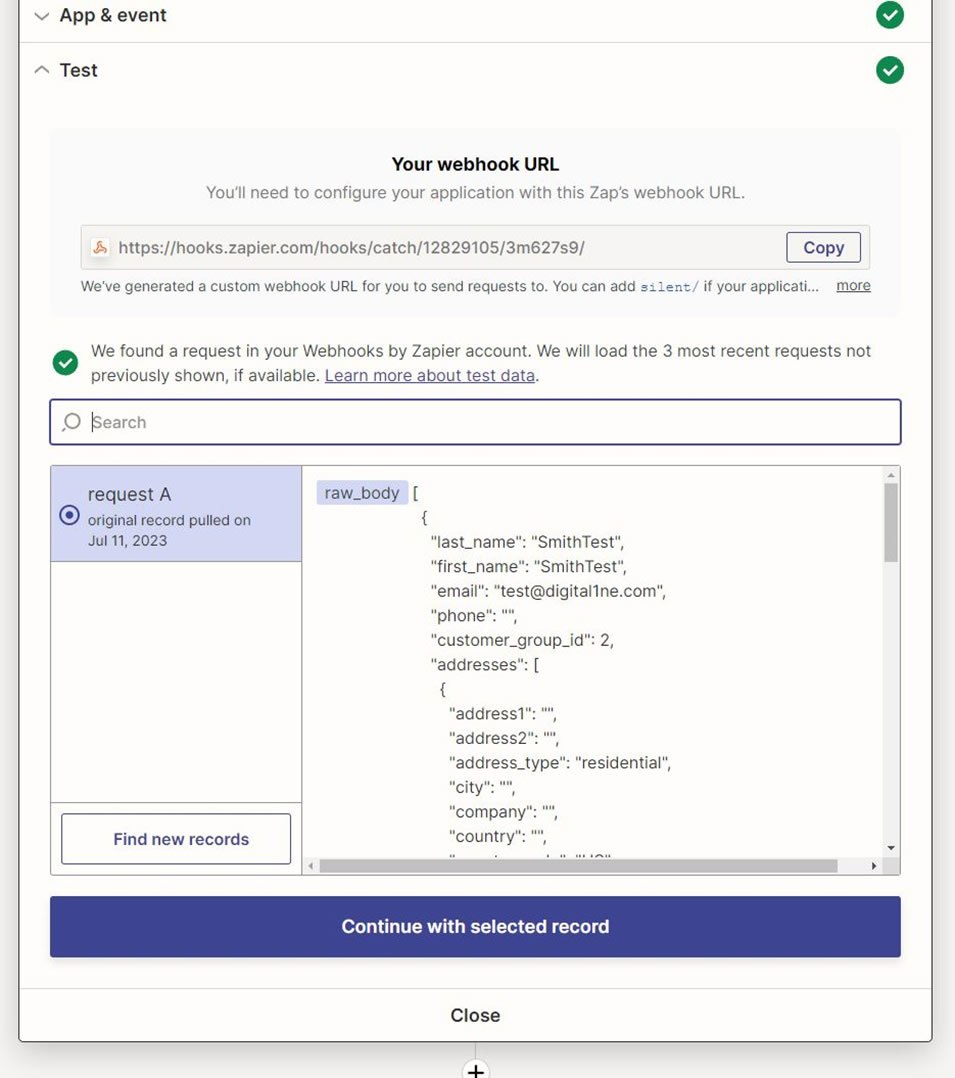
- After you’ve selected your call type, you’ll need to put in your request URL. In this example, we’re going to use a Zapier webhook catch URL for simplicity, but this can literally be any API endpoint URL.

- For the “Data-Pass-Through” field, simple leave this as “false” if you’re request requires a body. Only have this as “true” IF you’re sending a call that doesn’t require a body – for example, a GET request.
- Now it’s time to enter the body of your request. Zapier calls this “Data” but it’s just the place to drop your raw API body. In this example, we’ll use JSON to send a request to create a new customer in BigCommerce.
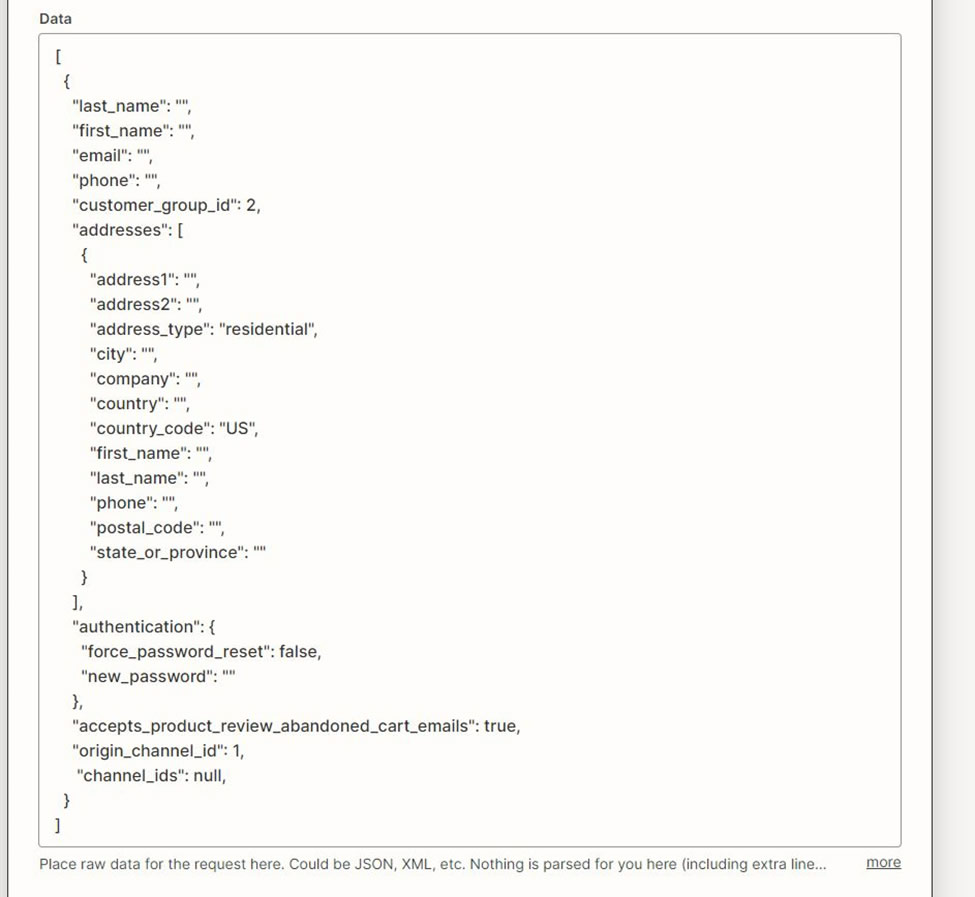
- Notice in our code example, there are currently no values in any of the calls. This is intentional and where Zapier is super powerful as a tool. Using Zapier, we can enter any piece of data/value used in any other step in this Zap – and it’s all dynamic. Simply click in your code anywhere and the following menu will appear
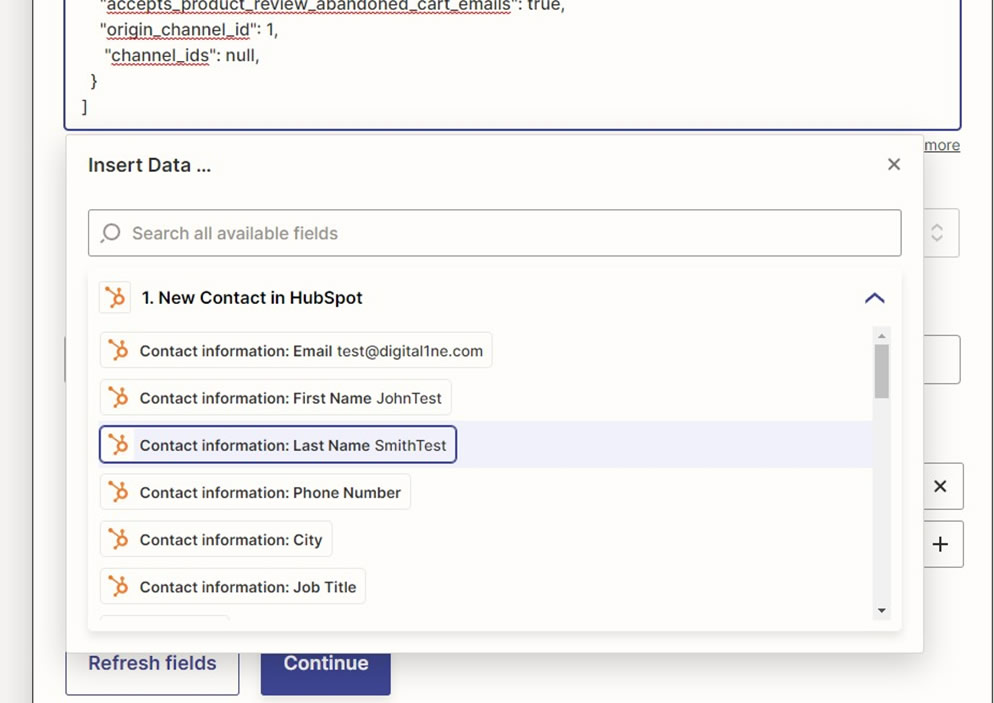
You can now select any piece of dynamic data from the previous step. In our example, any piece of data HubSpot generated when a new contact was created by the platform. - When filled out, your call may look something like this:
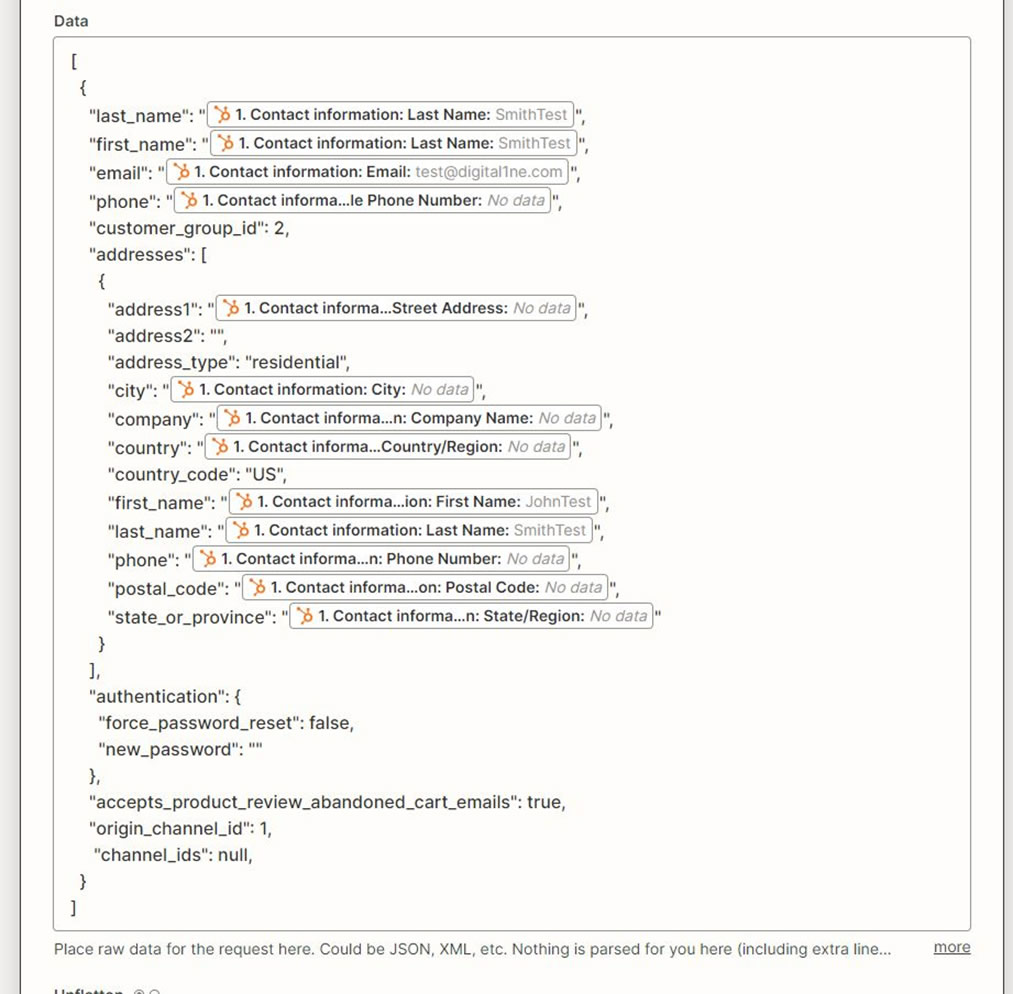
This is one of the most powerful parts of using Zapier to run calls. Zapier makes it extremely easy to plug in dynamic data received from any other platform and/or step in the Zap or even data generated by Zapier itself. We’ll examine this more in subsequent posts. - The “Unflatten” feature can be confusing. It’s “Yes” by default. However, I recommend turning this to “No” if you’re writing your own code. Unless you know your requests require this. If you’re having issues with your call, you may need to re-enable this if your platform requires it.
- Headers are handled a little differently in Zapier. They actually give you specific fields to enter any headers you have. If you’re an experienced coder, normally your headers will be something like this:
- X-Auth-Token: [TOKEN GOES HERE]
- However, in Zapier, they’ll add the “:” for you, and you simply need to enter the raw values for your headers in the boxes. Check out the example below:

- NOTE: For our call, we don’t need the X-Auth-Token because we’re sending to a webhook URL in Zapier. However, you will need a token for BigCommerce calls under a normal operating environment.
Testing and Confirmation
- Finally, it’s come time to test your call. After you complete the ACTION section of your Zap, the next tab is test. Go ahead and hit the test button, which will run your call and send your request to the target URL you set.

Most platforms will return a response upon successful receipt of the call. A Zapier webhook catch URL returns the response shown above - We can also check that the data was received by checking our Zapier Webhooks catch
Closing Thoughts
Hopefully this post was able to act as a quick guide to creating and sending API calls using Zapier’s Webhooks tool. However, it also barely scratches the surface of what is possible within the platform. We’ll continue to write more posts exploring the different capabilities and features of Zapier’s Webhooks tool.
Digital 1 is Here to Help
If you’ve been exploring using Zapier to integrate platforms and/or send and receive data between platforms, we’re here to help. We’ve got extensive experience helping businesses automate tasks, sending and receiving data between platforms, and creating automations using the Zapier platform. Click below to get in contact with our experts and start your automation journey today!